Forum Replies Created
-
AuthorPosts
-
in reply to: Technical advice needed #77508
Hello,
Please check if it is this item, https://www.amazon.com/dp/B07F24WGBB?ref=myi_title_dp
The maximum output current is 3A. If you want to get 4.35A, it is not suitable.
Are you going to connect bulbs in series or parallel?
in reply to: YB27VA volt amp panel meter missing a wire #77291Hello,
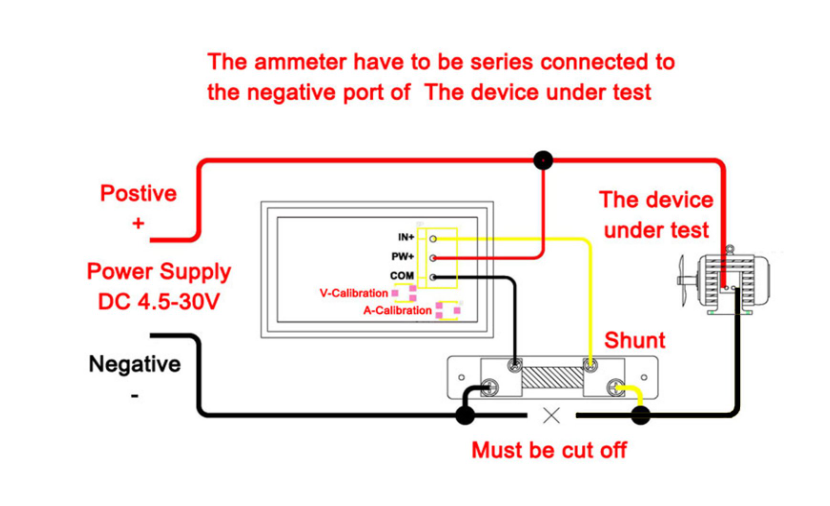
Is it this item? #100177, https://www.amazon.ca/dp/B00GLKQOKI?ref=myi_title_dp
Thre are only three wires. You should receive wrong instruction, please refer to below wiring diagram.
 in reply to: manuals for your product #77222
Hello Heather Lobbezoo,
Here is a simple manual for your referen. https://www.droking.com/cs/wp-content/uploads/2018/09/090438.pdf
If you need to find other replacement, could you please tell us the input voltage/current and output voltage/current range?
Best regards,
DROK
in reply to: manuals for your product #77009Hello Heather Lobbezoo,
We can’t search item with YH11063D,would you like to offer product link or SKU number?
And if you want to find other replacement, could you please tell us the input and output range?
Best regards.
in reply to: manuals for your product #76834Hello Joe Ford,
The SKU number #200218 has been updated to #200570.
Here is a instruction for your reference. https://www.droking.com/cs/wp-content/uploads/2021/07/200570.pdf
Best regards.
in reply to: CV/CC QS-1235CCBA-100W #76688Hello,
You just need to roate CC potentionmeter directly with load. In case your load is damaged, please turn CC down to minimum value and then connect load.
Please kindly notice voltage converter can only set a limit for load current. Actual output current mainly depends on load.
Best regards.
Hello,
If you don’t have standard 5v power supply and 2A constant current load tester, it is not recommend to calibrate voltage and current. Here is instruction for your reference.
https://www.droking.com/cs/wp-content/uploads/2021/07/200186-calibration.pdf
The reserved DIY terminal can be connected to power supply that is not with USB port.
Best regards.
in reply to: Running hot, cannot adjust voltage #76480Hello,
Could you please offer product link or sku number so that we can confirm which item it is? And how large is the input voltage/current?
If possible, would you like to show your problem by video or images? With more details, we can find solution quickly.
Best regards.
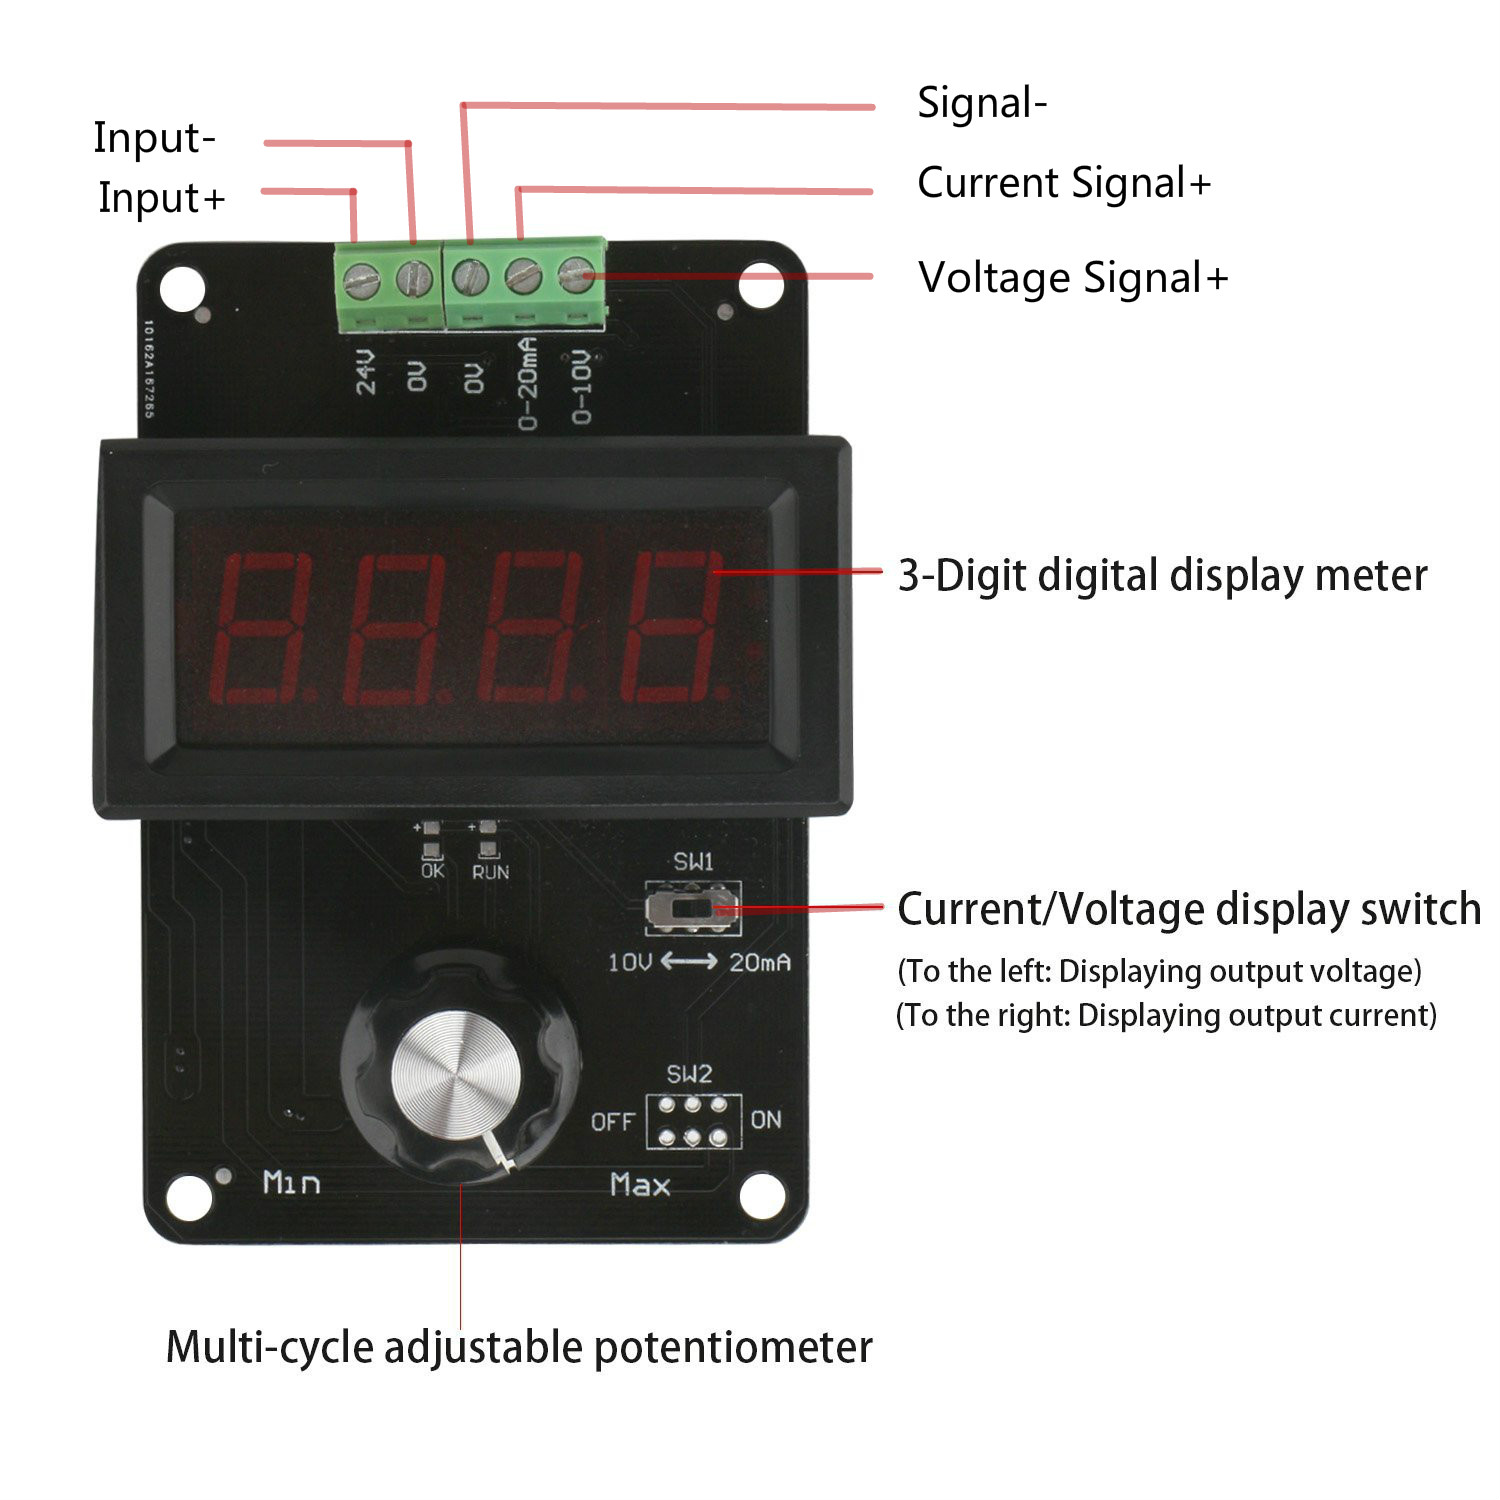
in reply to: Loop powered input 4-20mA wiring #76477Hello,
Are you going to power the #300482 with the 16VDC loop power supply?

Hello,
Here is the link for 200220, https://www.amazon.com/dp/B07QYSHF75?ref=myi_title_dp
Best regards.
in reply to: meter not working #76272Hello Hector Valenzuela,
Is it this item? https://www.amazon.com/dp/B01MRZAFAF?ref=myi_title_dp
Could you please tell us more details? Can’t it power on now? And what kind of deviced is connected with it?
Best regards.
in reply to: DIY Variac #76053Hello,
Do you need a AC meter? Could you pleas tell us the current and votlage range?
Hello,
We replied to you in the other post. Please check it.
Best regards.
-
This reply was modified 3 years, 5 months ago by
 Drok.
Drok.
in reply to: 200389 Programming #75653Hello,
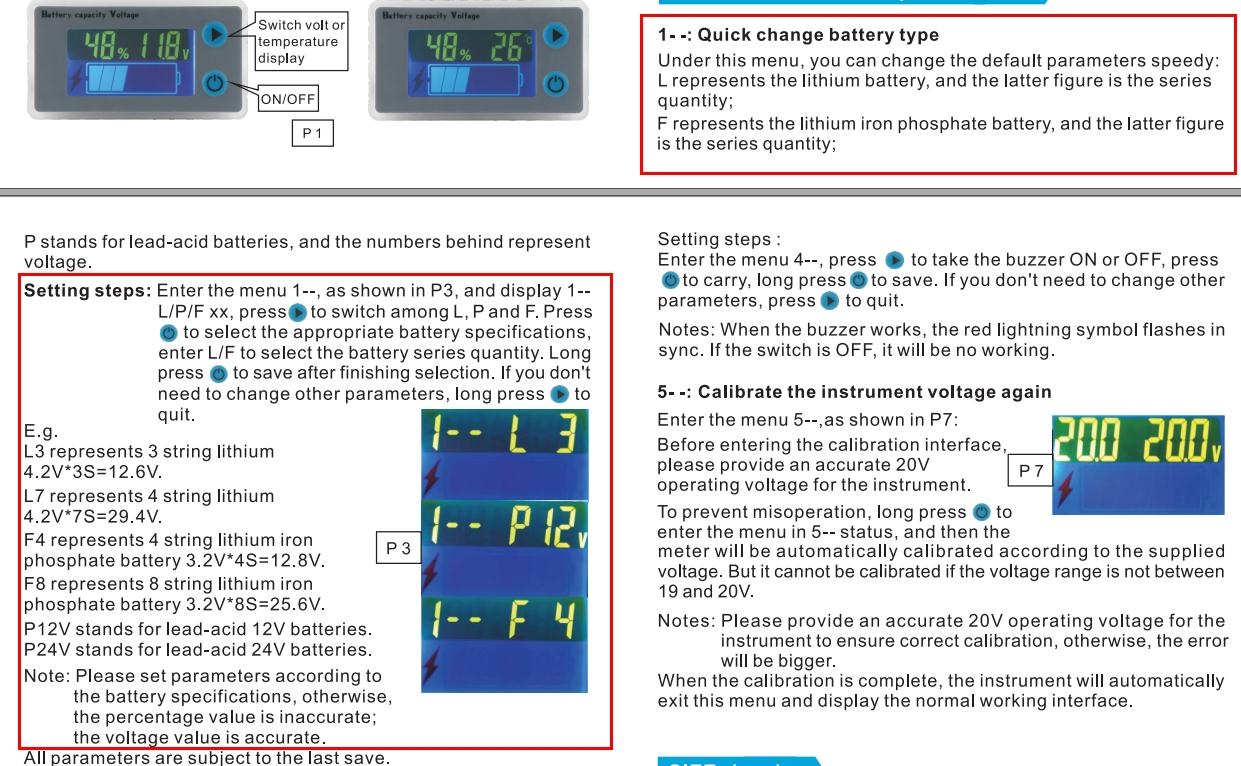
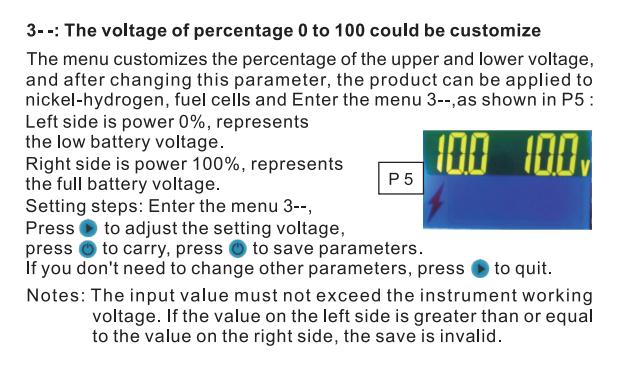
Please refer to below instruction. There are two setting menus. You just need to program one of them. Some battery type can be quickly set in menu 1. If you can’t find suitable battery type, please program menu 3, custom setting.
For this meter, one lithium battery is 4.2v. If you select L3, that means the total battery voltage is 4.2×3=12.6v.
Menu 1-

Menu 3-
 in reply to: VAC8010F-80V non-functioning KWH display #75651
Hello Aroen,
If voltage reading is incorrect, you can try calibration. Please refer to below instruction.
Adjustable power supply is required.
- Hook it up correctly with adjustable power supply. Please makesure load current is off in this case.
- Power on. Supply voltage is set to 12v and current is 11A.
- Before calibrating voltage, we can reset the current zero. Short press the down button to move cursor to CER, then short press the ok button (the middle button) to reset current zero.
- Move cursor to NCP, then hold the ok button to enter calibration menu, then release button.
- Short press ok button to switch the voltage range from 0-20v to 20-120v. And supply voltage is set as “54v”. Then adjust displayed voltage until it is the same as load voltage.
- Short press ok button to switch back to 0-20v voltage range. And supply voltage is set as “12v”. Then adjust display voltage until it is the same as load voltage.
- Just repeat above two calibration steps until displayed voltage and load voltage are the same when supply voltage is 12v and 54 v. Then calibration is finished.
-
This reply was modified 3 years, 5 months ago by
-
AuthorPosts
